2 Step Verification – How to Setup Gmail Two Factor Verification

The 2 step verification is another means of providing extra security to your account using two-factor authentication one after the other to complete the sign-in process to your account.
Two-factor authentication also known as 2FA is available on Android, iPhone, Mac, and PC. Would you like to know how to step up 2 step verification on your Gmail Account and all other social media network platforms? It’s fast and easy to set up; it helps protect your online account outside from username and password.
Basically, it requires an email address or phone number as it goes thou; after you must have log-in to a network service, then you can use your mobile device to verify your identity by typing a text code number sent by the authenticator app or by voice and also by clicking on an email link sent to you. However, the code can only be used once else you opt for another if there is any delay.
There are different authentication apps that are popular and available online, like Google authenticator, Microsoft authenticator, Authy, HDE OTP for IOS only, the moment you log-in to your network and request for code is asked, quickly switch to your authenticator app and get the generated code to verify you as the rightful user.
The importance’s of 2 Step Verification
Password alone might not really be strong enough to protect your email, but with this article, you will get to see the reason why it’s necessary to set-up two –factor authentication to safeguard your Gmail.
Moreover, it’s very dangerous putting all your vital information in a place, although for you is just the best option and safe.
All your social media account and emails are very important with some harboring vital information like accounts for online banking services and maybe office information, which you can’t afford to lose to internet fraudsters/ hackers. The 2 step verification helps to eliminate such fraudsters from gaining access to your accounts
How Two Factor Authenticator works in Gmail
Gmail 2 Factor Verification like a said earlier enables you to add extra security features to your Gmail account aside from password. A unique code is sent to you via Google authenticator app, text, and voice call, and your normal password to log into your Gmail account.
How to Set Up 2-Step Verification on A Gmail
- The 2 step verification is very easy to set up, below is a step by step approach.
- Login to your Gmail account https://mail.google.com/
- Navigate towards your right-hand side where you have your profile image and click enter
- Select manage your Google Account
- Select Security check (Keep account protected)
- The next step is to click the 2-step Verification or move to google.com/landing/2step/
- Click on Get Started
- Enter password click on Next
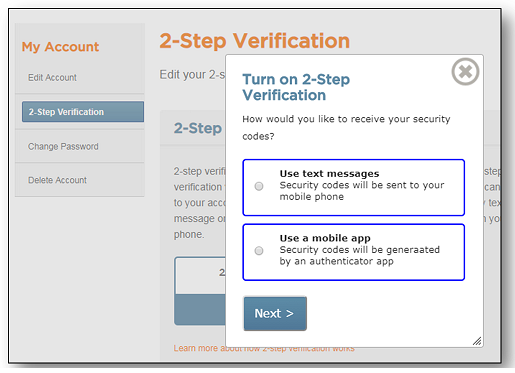
- Enter your phone number and pick a method of receiving code, either through text message or phone call. Thereafter, tap the Next button
- Type in the verification code you receive and click on next
- Click Turn On it will activate your Gmail 2-Step Verification
At this point, you are good to go with your activated free Two Factor Authenticator on your Gmail.
How to Turn Off Gmail 2-Factor Verification
Usually, it is not advisable to Turn Off already set up 2-step authenticator in your device. Nevertheless, if there are good reasons to do such then follow the steps below;
- Go to back to your https://mail.google.com/
- Navigate towards your right-hand side where you have your profile image and click enter
- Select manage your Google Account
- Select Security check
- The next step is to click the 2-step Verification and tap the On button
- Log-in to your Gmail account
- Navigate to the screen and tap on Turn Off
- Select the Turn Off button on the dialog box and disable the 2-step verification running on your account.
Lastly, with the above steps, the Two-factor authenticator is successfully disabled on all accounts.